Sunday, January 22, 2017
GP9 Decaling
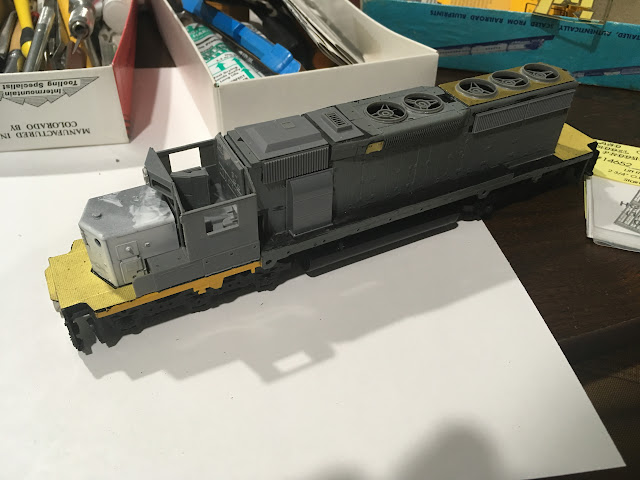
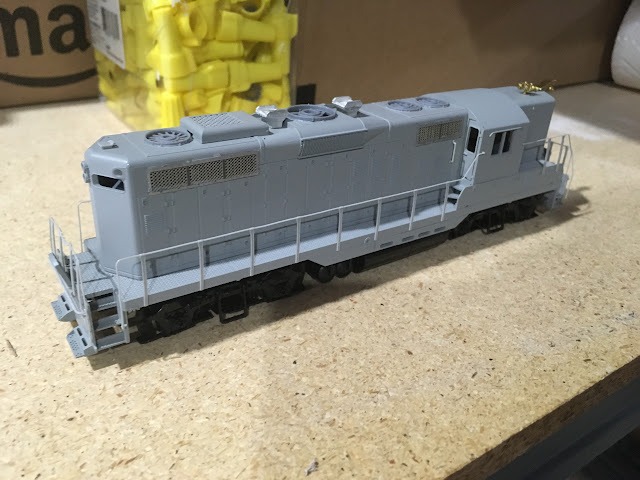
It took all week to get to, but decal work has begun on the GP9s. The striping is quite tedious. Here's a few photos of everything coming together.
Tuesday, January 17, 2017
Forward Progress - GP9 Update
With the long holiday weekend, I grabbed the change to spend a few hours working on the GP9s. I'll let the photos speak for themselves.
Paint is finished on these two. Not the best paint job, I'm a bit rusty, but these units are sporting the easily diesel scheme so and holidays in the paint will aid in weathering at the end of the day. My goal is to get some decals applied so look for an undate toward the end of the week.
Paint is finished on these two. Not the best paint job, I'm a bit rusty, but these units are sporting the easily diesel scheme so and holidays in the paint will aid in weathering at the end of the day. My goal is to get some decals applied so look for an undate toward the end of the week.
Friday, January 13, 2017
Why Blog?
For the past year, I've spent a solid chunk of time reading other people's blogs. I really enjoy reading each story about how their layouts and other projects come together. Recently I came across a blog post written by Chris Abbott, see the link below.
This post got me thinking a lot about why I am writing a blog, probably because I draw a lot parallels with my own work. My best quality with my builds is starting new projects, and my worst quality is finishing them. I have probably dozens of projects in various states of completion. Often, I will work on something until I hit some form of a sticking point, at which point it usually goes back in a box to sit. Both projects I have presented thus far here have been in the works for more than a year, the SD40-2 for at least two. In actually, its rare I actually finish a project. A big reason I started this blog is to help create a form of accountability in regards to finishing stuff.
My second best quality is accumulating stuff. In his blog Chris reflects on issues regarding his space constraints. This connects with me as I currently face a space crunch as well. When we moved into our current house last year, I had a large space for a layout and workshop. However this summer my wife started a business that now occupies what was to be the train room. Don't get me wrong, this arraignment was agreed on, there was not a hostile takeover. There is space elsewhere in the house I can use, but is fairly full with stored items, so I have the opportunity in the future to build a layout. In the meantime, I am stuck working out of boxes on whatever convenient space I can find.
The third major factor Chris discussed is time availability. Time for hobbies is something I don't have much of. With a full time job, helping my wife with her business, and raising my three year old daughter fills up the hours pretty effectively. However, I try to make time when I can. I also try share my interests with my daughter, building trains might catch on after all.

EMD's latest model, the offroad SD40-2
Tuesday, January 10, 2017
New Features
As I mentioned in my opening post, this blog has been a long time in the making, almost a full year. During that time, I've read a lot of other blogs, many of which I thoroughly enjoy following. I've added a sidebar on the right that lists some of my favorites. Enjoy!
Monday, January 9, 2017
BC Rail 747
I'm sure some of you are wondering, what does a BC Rail SD40-2 have to do with a remote junction in the north woods of Maine? The answer is simple, absolutely nothing. In 2006, I spent three months working in Alaska, which led me on a nearly decade long journey to build a layout based on a freelanced line connecting the Alaska Railroad to the BC Rail. Ultimately, I came to the conclusion that modeling a high traffic mainline in HO scale would not be practical unless I had a very large space. That, plus the desire to do something a little closer to home lead me to shelve the Alaska project and develop the Somerset project.
So how does this SD40-2 fit in? I began this project a couple years ago, after finding an Athearn Blue Box shell on eBay for cheap. Since then, I've proceeded to hack and cut most of the details away in order to replace them with after market parts. Why would I go through the trouble? Because I can, more specifically, so I can practice. The big reason I've continued this project beyond the end of my Alaska concept is so I gain experience with using aftermarket parts, modifying shells, and painting complex schemes (not there on that factor yet). Some of these skills I've already put to use with my GP9 project. I will continue to pick away at this over time.
So here's a series of photos showing what I've done over the last few months. I think I have some older photos showing the start of the build, so if I dig those up I'll add them here.
Overview shot taken back in November
Nose detail shot, modified to accept the nose headlight.
Cab interior from Cannon kit
Here I've replaced the stock long hood end with a Cannon part, as well as the radiator grilles (also Cannon) and fans (Plano base, Cannon fans).
Conductor's Side Overview
Engineer's Side Overview - Details West horn added
Thursday, January 5, 2017
GP9 Project - An Update
I've gotten a bit of time in at the workbench this week, and they are inching towards completion. I've now completed installing the Plano radiator shutters and grilles, which really look great. Below I am including a series of photos to show how I went through this work.
First step is to remove the cast grilles on the shell. To open up the grille, I used a larger bit (#50-60 range, specific size is unimportant) to drill a pair of holes in the corners of the mesh section of the grilles. Then using an exacto keyhole saw blade, I cut out the remaining mesh, leaving the raised flange around the edge. Once the mesh is removed, I then carved of the surrounding flange using a mix of exacto blades (#11 and #17). It is important to only create a through hole large enough for the shutters to fit, you need to leave enough "meat" to install the new grilles onto. Unfortunately, I neglected to take photos without the shutters installed, but see below for a view with the shutter installed without the replacement grille.
So at this point, I have three shells completed to this point. Where this blog comes in handy, is not only am I able to share my work, I can utilize this space to document what I have done for future reference, and to help organize remaining work on projects to help me push towards completion.
Work remaining on the GP9s:
- Install lift rings
- Paint/Decal
- Install remaining fan parts
- Install grab irons
- Install antenna, MU hoses
- Weather
- Install glass parts (windows, numberboards, lights)
- Prepare drive, including prepping for sound installation (control system of choice to be discussed in a later post)
- Install couplers
Please feel free to comment, and to make suggestions. I hope this blog helps me stay organized because I can be forgetful from time to time, so if I seem to be missing something, let me know!
First step is to remove the cast grilles on the shell. To open up the grille, I used a larger bit (#50-60 range, specific size is unimportant) to drill a pair of holes in the corners of the mesh section of the grilles. Then using an exacto keyhole saw blade, I cut out the remaining mesh, leaving the raised flange around the edge. Once the mesh is removed, I then carved of the surrounding flange using a mix of exacto blades (#11 and #17). It is important to only create a through hole large enough for the shutters to fit, you need to leave enough "meat" to install the new grilles onto. Unfortunately, I neglected to take photos without the shutters installed, but see below for a view with the shutter installed without the replacement grille.
The photo below shows the shutters on the fret. Each individual shutter is flat, as seen on the left. Focusing on the set in the upper right, you can see I've folded the vanes, one half is folded down, the other up. bending them is easy, only a little pressure using the side of a #11 blade was sufficient. Ensure each vane is folded to about 90 degrees from the frame, this is necessary to allow the vanes on each half to mesh properly when you fold the halves together.
Once removed from the fret, you fold the halves together. The next few photos show the part glued together. After the halves are secured together, you can go back and set the position of the vanes, anywhere from full open to fully closed. I set mine to approximately 45 degrees.
After the shutters are installed, seen here is a generator grille that has been removed from the fret and cleaned up, all ready for installation.
Here is a close up of the installed grille.
Finally, this shell is nearly ready for the paint booth.
So at this point, I have three shells completed to this point. Where this blog comes in handy, is not only am I able to share my work, I can utilize this space to document what I have done for future reference, and to help organize remaining work on projects to help me push towards completion.
Work remaining on the GP9s:
- Install lift rings
- Paint/Decal
- Install remaining fan parts
- Install grab irons
- Install antenna, MU hoses
- Weather
- Install glass parts (windows, numberboards, lights)
- Prepare drive, including prepping for sound installation (control system of choice to be discussed in a later post)
- Install couplers
Please feel free to comment, and to make suggestions. I hope this blog helps me stay organized because I can be forgetful from time to time, so if I seem to be missing something, let me know!
Monday, January 2, 2017
Operating on the Northern Terminal
This past weekend, I attended an operating session on Brandon K's Northern Terminal layout. Brandon's layout is based on a 1970's era line connecting Waterville and Rockland over the former narrow gauge WW&F right-of-way. I used to operate on this layout regularly before a career move and family made the trip much more difficult.
A trio of borrowed CP locomotives lead the wood job into Rockland
The wood job pulling through the yard at Rockland
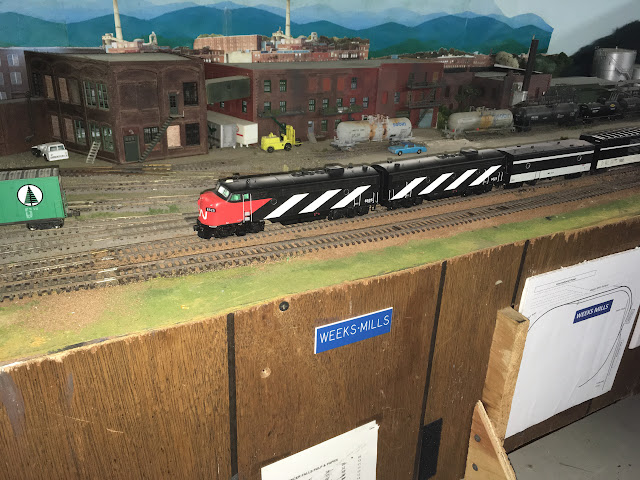
CN Passenger Railfan Extra waits for a meet at the paper mill at Weeks Mills.
CN Extra meeting a local headed up by MEC 574
Entering Branch Pond, with Weeks Mills in the distance
Crossing the trestle into China
Passing the station at North Vasselboro
Pulling through the yard at North Vasselboro
A pair of CP SD40-2s lead a manifest from Rockland past Kennebec Logging into North Vasselboro while a pair of MP15s work the yard.
A second wood job headed up by both Maine Central's RS11s pass the rear end of a ballast extra at North Vasselboro
Thank you Brandon for hosting. It was great to catch up with you and with everyone else in attendance.
Sunday, January 1, 2017
GP9s
One of the first locomotive projects I've been working on for my Somerset road is a trio of GP9s. I'll let the photos do the talking on these, only some fairly basic mods have been made.
Somerset GP9, former passenger locomotive. Added Cal-scale bell and horn, and Cannon fan sub-bases.
Close up. Solid end rail will be modified with a drop step to match other units.
A few more cabs
Plano grille shutters
Replacement grille screens from Plano
Gotta Start Somewhere
Welcome! This blog has been a long time coming, as I made the decision almost a year ago to start this. Well, there's no time like the present!
This blog will focus on my construction of my layout, focused on Somerset Junction, with the occasional diversion here and there covering train shows I attend, operation sessions, model building projects etc. Somerset Junction is located at Mile 49 on the Canadian Pacific Moosehead Subdivision and at Mile 85.3 on the former Somerset Mainline. In history, the Somerset was purchased but the Maine Central Railroad in 1911 and incorporated into the MEC as the Kineo (later Madison) branch. With my layout I will be taking a few liberties with history, but that we will save for another post.
I hope this blog becomes an interactive forum for discussing railroading in the Moosehead region of Maine. I will try to post here regularly, but my life of late keeps my model building time somewhat irregular.
CMQ Train #1 at Moosehead Siding (11/17/16), four miles east of Somerset Junction.
Subscribe to:
Comments (Atom)


